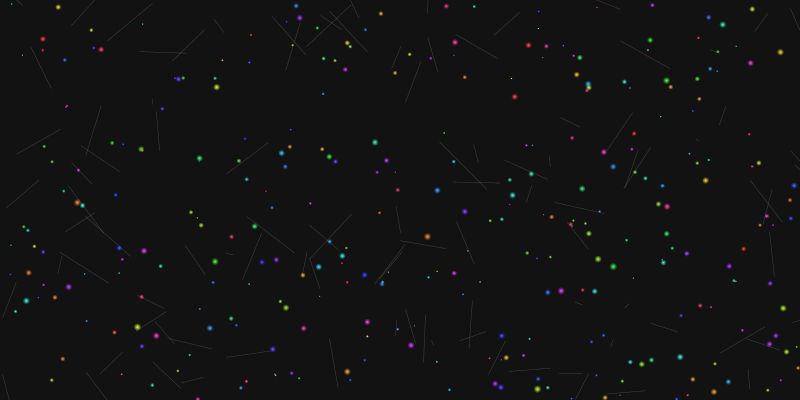
Particle Systems
Create mesmerizing particle effects that react dynamically to audio input
What are Audio-Reactive Particle Systems?
Audio-reactive particle systems are dynamic visual elements that respond to music or sound in real-time. These systems consist of thousands of individual particles whose properties-position, color, size, velocity, and more-change based on audio input.
By analyzing different aspects of audio data like frequency bands, amplitude, and beat detection, particle systems can create organic, flowing visualizations that perfectly complement music. From subtle pulses that match the beat to explosive bursts during climactic moments, particle systems add depth and dynamism to any audio-visual experience.
Key Characteristics
- Emergent Behavior: Simple rules applied to many particles create complex, organic-looking systems
- Audio Reactivity: Particle attributes are directly influenced by audio properties
- GPU-Accelerated: Modern implementations use WebGL and shaders for performance
- Infinite Variety: Endless creative possibilities through different behaviors and rendering styles
Components of a Particle System
Particle Properties
- Position: 3D coordinates in space
- Velocity: Direction and speed of movement
- Acceleration: Change in velocity over time
- Color: RGB values, often with opacity
- Size: Diameter or scale of the particle
- Lifetime: Duration a particle exists
Particle Behaviors
- Emission: How particles are created
- Forces: Gravity, attraction, repulsion
- Collision: Interaction with surfaces
- Flocking: Group behavior algorithms
- Turbulence: Chaotic movement patterns
- Flow fields: Direction maps for movement
Audio Reactivity
- Amplitude: Overall volume response
- Frequency Bands: Bass, mid, treble responses
- Beat Detection: Rhythmic pulse effects
- Onset Detection: Response to new sounds
- Spectral Analysis: Detailed frequency mapping
- Envelope Following: Response to audio shape
Implementation with Three.js
Creating audio-reactive particle systems with Three.js involves several key components: particle geometry creation, shader programming, audio data analysis, and real-time animation updates. The following example demonstrates a basic implementation:
// Create particle system
function createParticleSystem() {
  // Set up particle count and data
  const particleCount = 10000;
  const particles = new THREE.BufferGeometry();

  // Create arrays for attributes
  const positions = new Float32Array(particleCount * 3);
  const colors = new Float32Array(particleCount * 3);
  const sizes = new Float32Array(particleCount);

  // Initialize particles in a sphere distribution
  for (let i = 0; i < particleCount; i++) {
    const i3 = i * 3;

    // Random spherical positioning
    const radius = 20 * Math.random();
    const theta = Math.random() * Math.PI * 2;
    const phi = Math.acos(2 * Math.random() - 1);

    positions[i3] = radius * Math.sin(phi) * Math.cos(theta);
    positions[i3 + 1] = radius * Math.sin(phi) * Math.sin(theta);
    positions[i3 + 2] = radius * Math.cos(phi);

    // Random colors
    colors[i3] = Math.random();
    colors[i3 + 1] = Math.random();
    colors[i3 + 2] = Math.random();

    // Random sizes
    sizes[i] = Math.random() * 2 + 0.5;
  }

  // Add attributes to geometry
  particles.setAttribute('position',
    new THREE.BufferAttribute(positions, 3));
  particles.setAttribute('color',
    new THREE.BufferAttribute(colors, 3));
  particles.setAttribute('size',
    new THREE.BufferAttribute(sizes, 1));

  // Create shader material
  const material = new THREE.ShaderMaterial({
    uniforms: {
      time: { value: 0 },
      audioLevel: { value: 0 },
      bassLevel: { value: 0 },
      midLevel: { value: 0 },
      highLevel: { value: 0 }
    },
    vertexShader: vertexShader,
    fragmentShader: fragmentShader,
    transparent: true,
    blending: THREE.AdditiveBlending,
    depthWrite: false
  });

  // Create particle system
  const particleSystem = new THREE.Points(particles, material);
  scene.add(particleSystem);

  return {
    geometry: particles,
    material,
    system: particleSystem
  };
}
Vertex Shader
The vertex shader controls the position and size of each particle, allowing for audio-reactive movement and scaling:
// Vertex Shader
uniform float time;
uniform float audioLevel;
uniform float bassLevel;
uniform float midLevel;
uniform float highLevel;

attribute float size;
attribute vec3 color;

varying vec3 vColor;

void main() {
  vColor = color;

  // Get original position
  vec3 pos = position;

  // Add time-based movement
  float angle = time * 0.2;

  // Apply audio-reactive displacement
  // Bass affects radial expansion
  float dist = length(pos.xy);
  float bassFactor = bassLevel * 2.0;
  pos.xy *= 1.0 + bassFactor * 0.2;

  // Mids affect vertical movement
  float midFactor = midLevel * 3.0;
  pos.z += sin(dist * 0.5 + time) * midFactor;

  // Highs affect rotation
  float highFactor = highLevel * 1.0;
  float rotX = cos(angle * (1.0 + highFactor));
  float rotY = sin(angle * (1.0 + highFactor));
  pos.xz = mat2(rotX, -rotY, rotY, rotX) * pos.xz;

  // Set position
  vec4 mvPosition = modelViewMatrix * vec4(pos, 1.0);
  gl_Position = projectionMatrix * mvPosition;

  // Set point size (responsive to audio)
  gl_PointSize = size * (1.0 + audioLevel) *
                (300.0 / -mvPosition.z);
}
Fragment Shader
The fragment shader determines the appearance of each particle, creating soft, glowing particles with audio-reactive colors:
// Fragment Shader
uniform float audioLevel;
uniform float bassLevel;
uniform float midLevel;
uniform float highLevel;

varying vec3 vColor;

void main() {
  // Calculate distance from particle center
  vec2 center = vec2(0.5, 0.5);
  float dist = length(gl_PointCoord - center);

  // Discard pixels outside radius (creates circle)
  if (dist > 0.5) {
    discard;
  }

  // Soft particle edge
  float alpha = 1.0 - smoothstep(0.3, 0.5, dist);

  // Apply audio reactivity to color
  vec3 color = vColor;
  color.r += bassLevel * 0.5;
  color.g += midLevel * 0.5;
  color.b += highLevel * 0.5;

  // Normalize color to prevent oversaturation
  float maxComponent = max(color.r, max(color.g, color.b));
  if (maxComponent > 1.0) {
    color /= maxComponent;
  }

  // Create glow effect enhanced by overall audio level
  float glow = 0.3 + audioLevel * 0.5;

  gl_FragColor = vec4(color * glow, alpha);
}
Audio Analysis and Animation
The final piece is connecting your audio analysis to the particle system in the animation loop:
// Create audio analyzer
const audioContext = new (window.AudioContext || window.webkitAudioContext)();
const analyzer = audioContext.createAnalyser();
analyzer.fftSize = 1024;
analyzer.smoothingTimeConstant = 0.85;

// Connect to audio source
const audioElement = document.getElementById('audioElement');
const source = audioContext.createMediaElementSource(audioElement);
source.connect(analyzer);
analyzer.connect(audioContext.destination);

// Create data arrays
const frequencyData = new Uint8Array(analyzer.frequencyBinCount);
const timeData = new Uint8Array(analyzer.frequencyBinCount);

// Animation loop
function animate() {
  requestAnimationFrame(animate);

  // Update audio data
  analyzer.getByteFrequencyData(frequencyData);
  analyzer.getByteTimeDomainData(timeData);

  // Calculate audio levels for different frequency bands
  const bassLevel = getAverageFrequency(frequencyData, 0, 10) / 255;
  const midLevel = getAverageFrequency(frequencyData, 10, 100) / 255;
  const highLevel = getAverageFrequency(frequencyData, 100, 255) / 255;

  // Calculate overall audio level
  const audioLevel =
    (bassLevel * 0.4 + midLevel * 0.4 + highLevel * 0.2);

  // Update uniforms
  particles.material.uniforms.time.value = clock.getElapsedTime();
  particles.material.uniforms.audioLevel.value = audioLevel;
  particles.material.uniforms.bassLevel.value = bassLevel;
  particles.material.uniforms.midLevel.value = midLevel;
  particles.material.uniforms.highLevel.value = highLevel;

  // Render
  renderer.render(scene, camera);
}

// Helper function for frequency band analysis
function getAverageFrequency(data, startIndex, endIndex) {
  let sum = 0;
  for (let i = startIndex; i < endIndex; i++) {
    sum += data[i];
  }
  return sum / (endIndex - startIndex);
}
Creative Variations
Fluid Dynamics Simulation
Create flowing, liquid-like particle movements by applying fluid dynamics equations. This creates mesmerizing, organic motion that's perfect for more ambient or flowing musical styles.
Implement using noise fields and curl functions to create natural-looking turbulence that reacts to audio frequency data. Bass frequencies can influence viscosity while higher frequencies control turbulence intensity.
Beat-Reactive Explosions
Create dynamic particle bursts synchronized with beat detection. When a beat is detected, particles explode outward from central points, creating visual impact during key moments in the music.
Implement using velocity vectors that rapidly accelerate particles away from origin points. Color intensity and particle lifetime can be tied to beat strength, creating more dramatic effects for stronger beats.
Audio-Reactive Textures
Map frequency data directly to particle textures or sprites. Each particle displays a small portion of the audio spectrum, creating a visualization that shows the entire audio profile at once.
Implement using custom textures or sprites for particles instead of plain circles. Use GLSL shaders to distort or modify these textures based on the frequency data, creating complex visual patterns.
Generative Structures
Create rule-based systems where particles form complex structures like fractals, geometric patterns, or organic forms that evolve based on audio input.
Implement using attraction points and rules that govern particle behavior. Different frequency bands can control different aspects of the structure formation, creating a visual representation of the music's complexity.
Performance Optimization
For smooth, high-performance particle systems, especially in live settings where reliability is crucial, consider these optimization techniques:
GPU Acceleration
- Use GPGPU techniques with compute shaders
- Implement THREE.GPUComputationRenderer
- Keep particle updates within shaders
Particle Management
- Implement LOD (Level of Detail) for distance
- Use frustum culling for off-screen particles
- Dynamically adjust particle count based on FPS
Rendering Techniques
- Use instanced rendering for similar particles
- Optimize shader complexity for performance
- Use simpler post-processing for glow effects
Audio Processing
- Process audio with Web Workers
- Apply data smoothing to reduce jitter
- Adjust analysis frequency for performance
// Example GPU Computation setup for particles
function setupGPUComputation() {
  // Initialize GPUComputationRenderer
  const gpuCompute = new THREE.GPUComputationRenderer(
    textureSize, textureSize, renderer);

  // Create data textures
  const positionTexture = gpuCompute.createTexture();
  const velocityTexture = gpuCompute.createTexture();

  // Fill textures with initial data
  initializeTextures(positionTexture, velocityTexture);

  // Create computation shaders
  const positionVariable = gpuCompute.addVariable(
    'texturePosition',
    positionShader,
    positionTexture
  );

  const velocityVariable = gpuCompute.addVariable(
    'textureVelocity',
    velocityShader,
    velocityTexture
  );

  // Set variable dependencies
  gpuCompute.setVariableDependencies(
    positionVariable,
    [positionVariable, velocityVariable]
  );

  gpuCompute.setVariableDependencies(
    velocityVariable,
    [positionVariable, velocityVariable]
  );

  // Add custom uniforms for audio data
  positionVariable.material.uniforms.audioData = { value: null };
  velocityVariable.material.uniforms.audioData = { value: null };

  // Initialize computation
  gpuCompute.init();

  return {
    compute: gpuCompute,
    position: positionVariable,
    velocity: velocityVariable
  };
}
Related Topics
Waveform Visualization
Explore techniques for creating dynamic waveform visualizations that represent audio amplitude and frequency data.
Audio Analysis
Learn about analyzing audio data in real-time to drive visualizations, including frequency analysis and beat detection.
Live Performance Setup
Practical guidance for implementing audio-reactive visuals in live performance settings, including hardware and software configurations.
Simplify Complex Particle System Creation with AI
While traditional methods offer detailed control, creating professional-quality particle systems can require hundreds of lines of code and deep Three.js expertise.
Compare Your Workflow
Traditional Approach
- Hours of WebGL/Three.js coding
- Complex shader programming
- Manual parameter tweaking
- Extensive performance optimization
With Compeller.ai
- Minutes to create particle systems
- No coding required
- AI-suggested parameter presets
- Production-ready performance
> Generate audio reactive particles that flow like ocean waves and respond to bass frequencies
Ready to Create Your Own Particle Systems?
Check out our resources page for downloadable code examples, project templates, and additional tutorials to get started right away.
Turn this workflow into reactive visuals
Use REACT by Compeller to create patent-pending audio reactive visuals, then join the Compeller newsletter for workflow updates and launch notes.